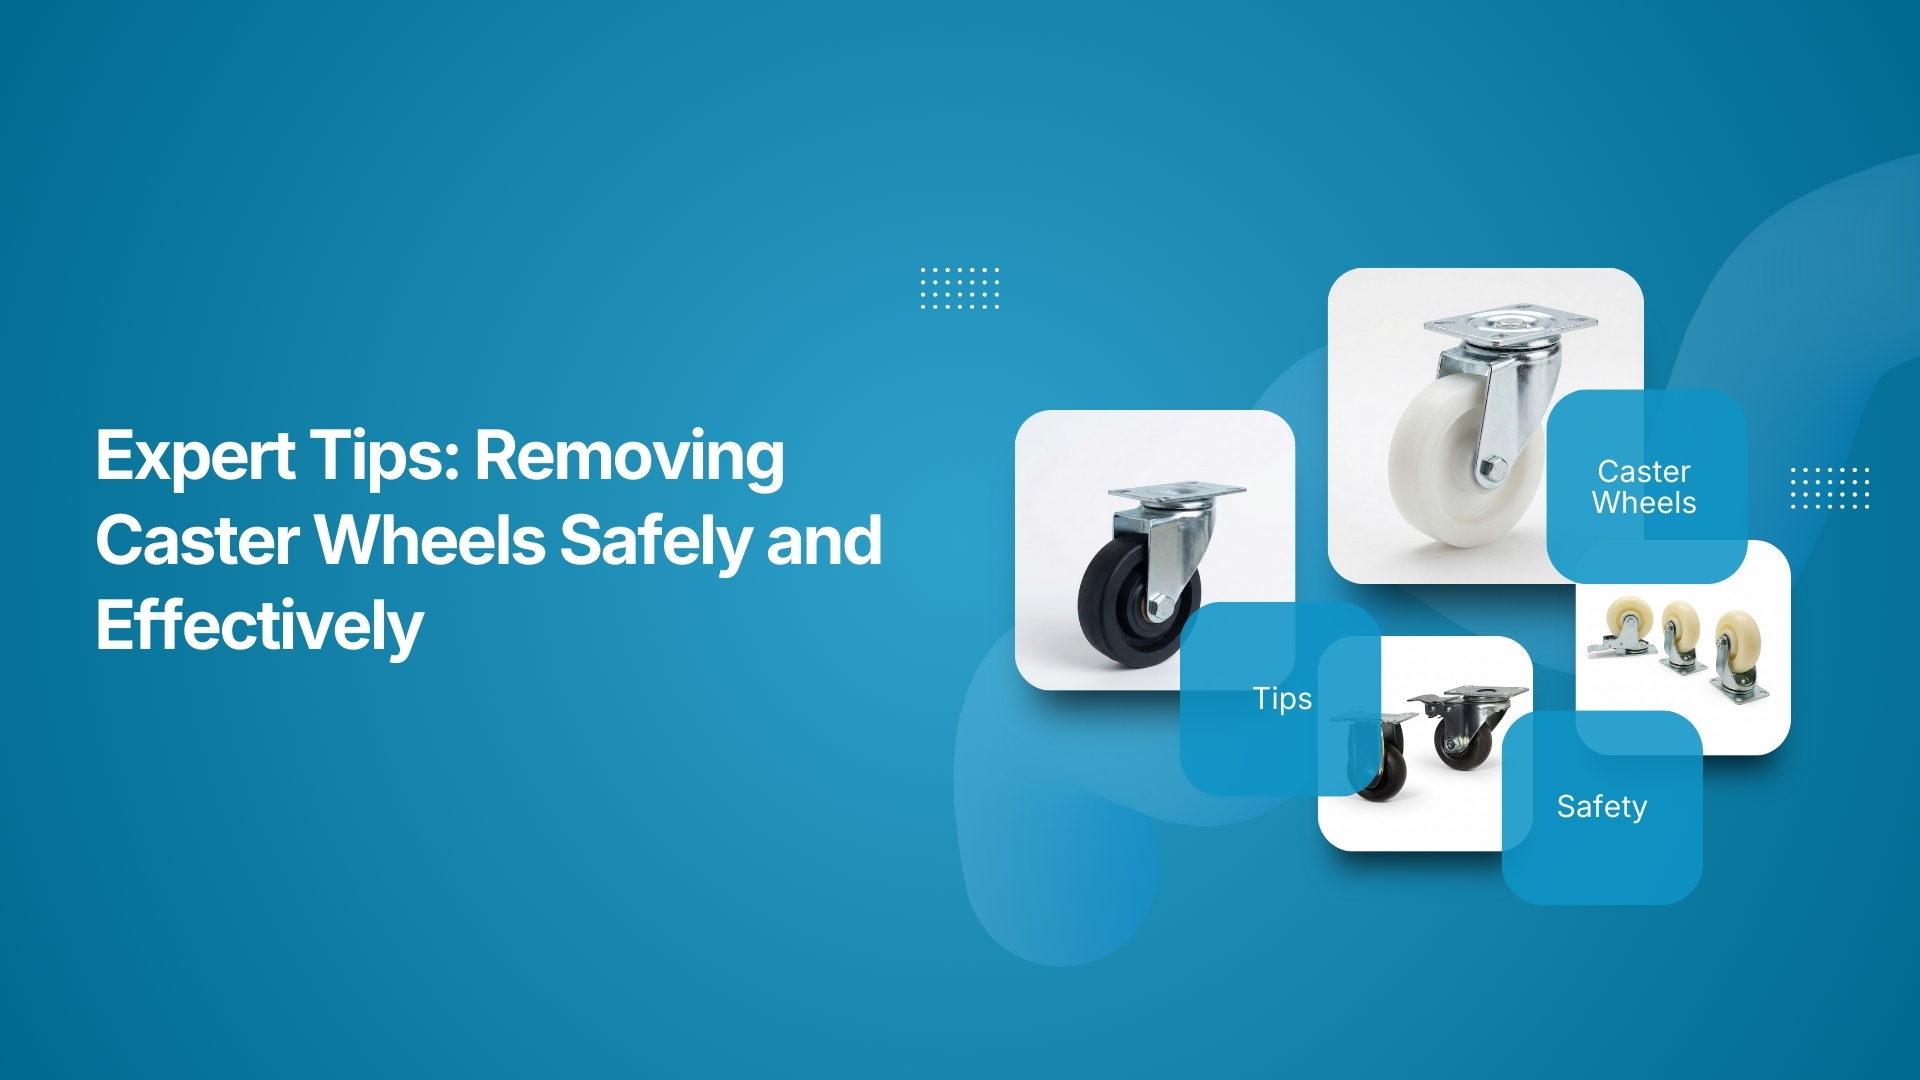
Caster wheels are essential components in industrial equipment, medical carts, and facility machinery, yet they are often overlooked until they cause a problem. A stuck or damaged caster can halt operations, increase downtime, and create unnecessary stress for plant managers, procurement leaders, and operations teams who rely on smooth equipment movement.
With the caster wheel industry projected to reach $11.99 billion by 2029, their role in keeping operations running smoothly is more important than ever. Ensuring caster wheels are removed safely and efficiently protects both your equipment and your workforce.
Using the right tools and techniques reduces the likelihood of damage, supports consistent lead times, and helps maintenance teams complete tasks faster. By approaching caster removal with practical steps and safety awareness, operations can maintain smooth equipment performance while minimizing repair costs.
In this guide, we’ll learn the essential tools, step-by-step techniques, safety measures, and expert tips that ensure caster wheel removal is carried out efficiently.
Key Highlights:
Safe and efficient caster removal starts with proper preparation, stabilizing equipment, and using the correct tools to prevent injury or equipment damage.
Understanding caster types, components, and mounting styles helps teams choose the right removal approach and avoid unnecessary force or part damage.
Following a structured step-by-step process and being aware of common mistakes ensures smoother removal and reduces the risk of delays or unplanned repairs.
Expert guidance and the right replacement options make caster handling easier, helping maintenance teams work accurately and maintain consistent equipment performance.
What are Caster Wheels?
Caster wheels are specialized wheels mounted on the bottom of equipment, carts, and furniture to facilitate smooth, easy movement. They handle various load capacities and environmental conditions, making them essential in industrial, commercial, and medical applications.
Key Components of Caster Wheels
Understanding the components of caster wheels helps in proper removal and replacement. Most caster wheels consist of:
Wheel: The primary rolling element. Material type (rubber, polyurethane, steel) affects durability, load-bearing capacity, and floor protection.
Fork/Yoke: Holds the wheel and connects it to the mounting plate. Removing the wheel often involves detaching it from the fork.
Mounting Plate or Stem: Attaches the caster to equipment. Proper removal requires knowledge of the mounting type to prevent damage.
Swivel Mechanism (if applicable): Allows the wheel to rotate. Swivel bearings may need lubrication or adjustment during removal.
Identifying these parts helps you select the right tools and prevents damage to both the wheel and the equipment. Next, let's explore the various types available, as this affects both removal techniques and tool requirements.
Types of Caster Wheels
Caster wheels vary in design, material, and load capacity. Selecting the correct type impacts operational KPIs such as floor damage, equipment uptime, and ease of handling.

Some common types include:
Rigid Casters
Rigid casters are fixed-direction wheels that allow straight-line movement only. They are commonly used on heavy equipment or trolleys that need stability and minimal steering.
You can remove rigid casters by unscrewing the mounting plate, making the process straightforward. Rigid casters are ideal for applications where lead time stability and consistent movement are priorities.
Swivel Casters
Swivel casters rotate 360°, providing full maneuverability. They are often installed on carts, hospital equipment, and mobile workstations. Disengage locks or brakes before removal to avoid damage.
Swivel casters support reduced downtime and smoother operations, particularly in environments where equipment mobility impacts throughput.
Heavy-Duty Industrial Casters
These casters are engineered for high-load applications, such as factory machinery or storage racks.
You may need specialized tools like hydraulic lifts or bolt extractors to remove these due to their weight and robust construction. Proper handling reduces the risk of equipment downtime and costly repairs.
Medical or Specialty Casters
Designed for sensitive applications in hospitals, labs, or cleanroom environments, these casters often feature precision bearings, locking mechanisms, and protective coatings.
Handle medical casters with extra care during removal to prevent floor damage and ensure reliable performance, supporting operational efficiency in critical settings.
Knowing the type of caster is essential before attempting removal, as each may require different handling and tools. In the next section, let's examine the tools required for the efficient removal process.
Essential Tools Required for Caster Wheel Removal
The right tools are crucial for efficient and safe caster wheel removal. Using improper tools can increase downtime and cause damage to equipment, floors, or the wheel itself.
Common tools include:
Wrenches and Socket Sets: Needed to loosen bolts on mounting plates or stems. Choosing the correct size prevents stripping and reduces effort.
Screwdrivers: Useful for removing smaller screws on specialty or medical casters. A precision screwdriver set can save time and protect delicate components.
Pry Bars or Flat Tools: Use pry bars or flat tools to lift wheels gently from tight mounts. This reduces the risk of damaging forks, bearings, or mounting plates.
Lubricants or Penetrating Oils: Ideal for loosening rusted or stuck hardware. Apply oil to minimize the force required and prevent damage to bolts or equipment.
Hammer or Mallet: Use a hammer or mallet carefully to tap loose, stubborn wheels or mounts. A soft-faced mallet protects the wheel and surrounding surfaces.
Protective Gear: Wear protective gear such as gloves, safety glasses, and work boots to prevent injuries during removal. Staying safe also helps minimize downtime from accidents.
Selecting the correct tools for your specific caster type minimizes removal time, reduces potential scrap, and supports safer handling. In the following section, let's examine the structured approach for removing caster wheels effectively.
How to Remove Caster Wheels: Step-by-Step Guide
Removing caster wheels may seem straightforward, but following a structured approach keeps your equipment safe and protects workers from injury.
Follow this step-by-step process to remove caster wheels efficiently:
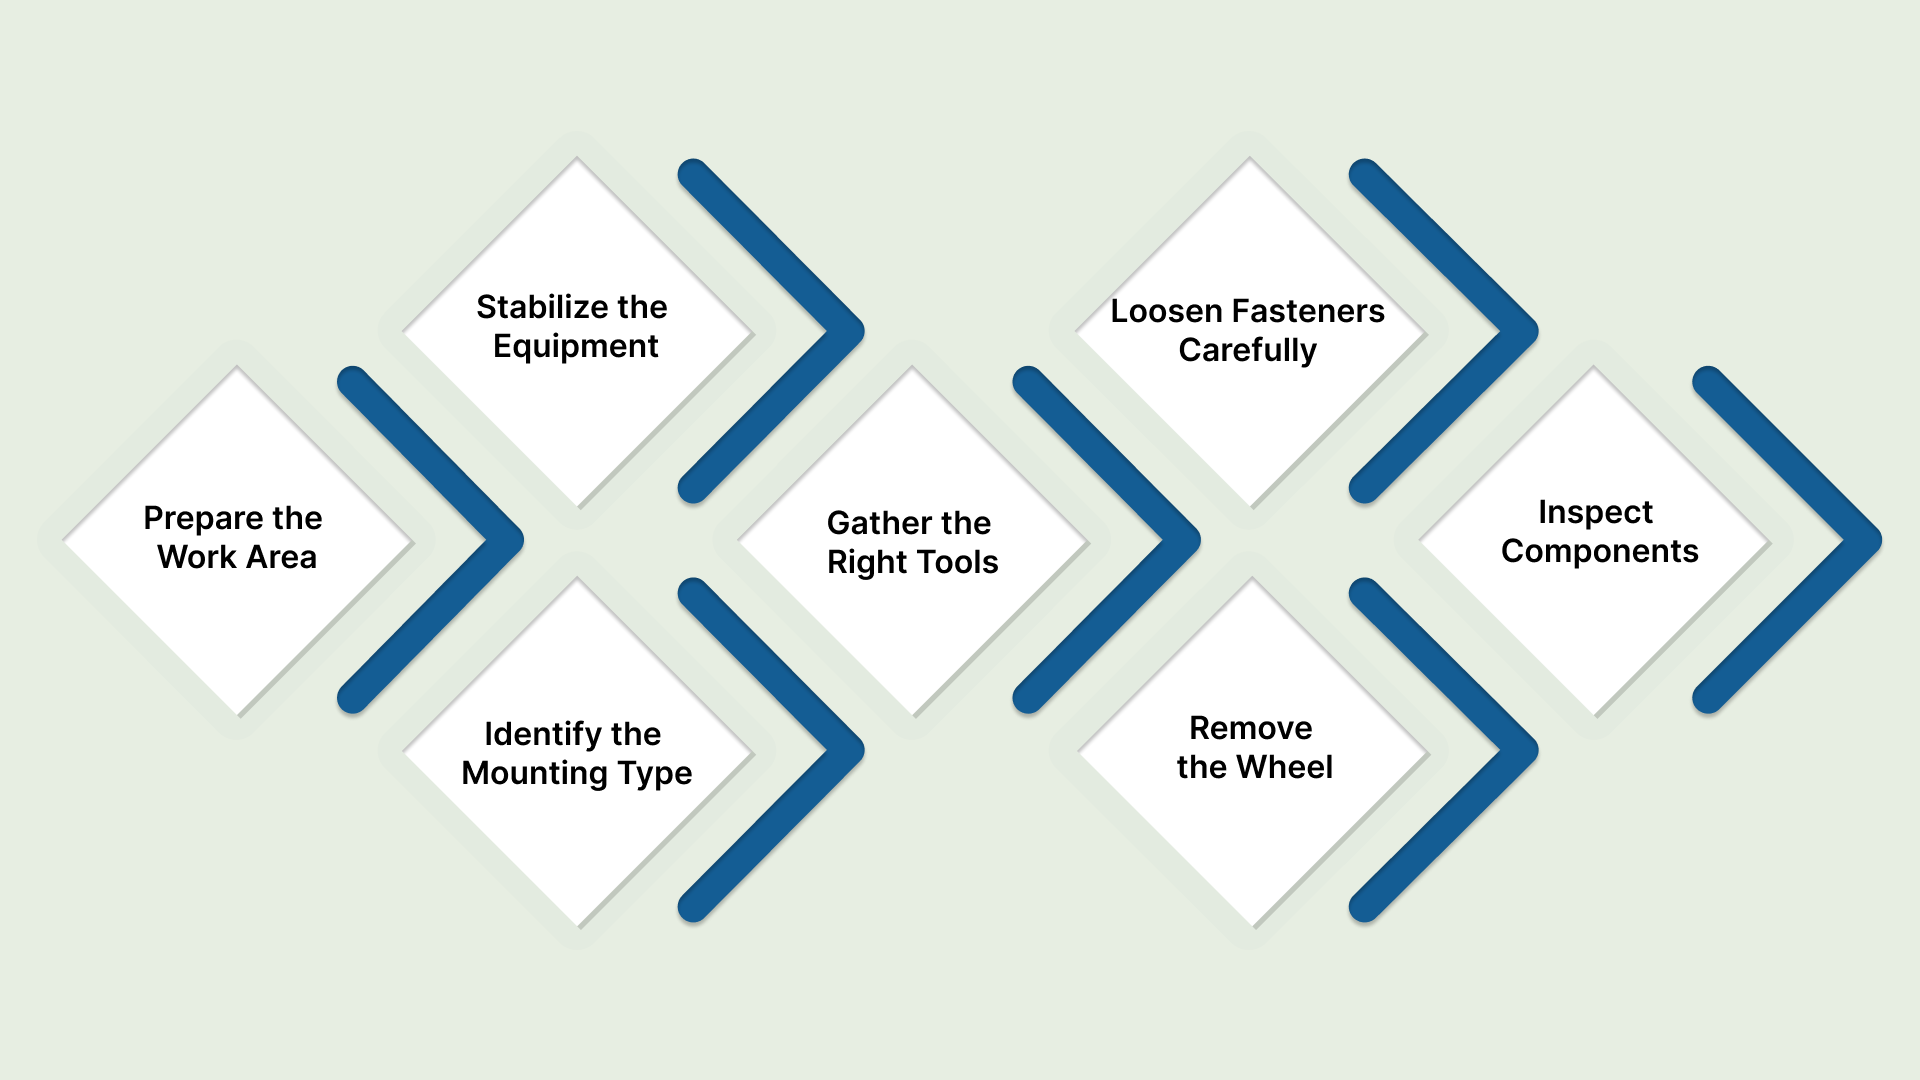
Prepare the Work Area
Before starting, clear the surrounding space to prevent trips, slips, or interference from other equipment. Having enough room lets you maneuver tools and wheels safely, reducing the chance of accidents or equipment damage.
Stabilize the Equipment
For heavy or mobile equipment, use chocks, blocks, or a jack to stabilize heavy or mobile equipment. Controlling unintended movement ensures safe removal, prevents tipping, and maintains alignment, which is crucial for operational continuity.
Identify the Mounting Type
Inspect the caster to determine if it uses a plate, stem, or other mounting system. Knowing the mounting type helps you pick the correct removal method, avoiding stripped bolts, damaged forks, or scratched floors.
Gather the Right Tools
Ensure all necessary tools, wrenches, screwdrivers, pry bars, and lubricants are on hand and in working condition. Having the right tools ready reduces downtime and avoids unnecessary improvisation that can damage equipment.
Loosen Fasteners Carefully
Loosen bolts, nuts, or screws with the right wrench or screwdriver. For rusted or stuck fasteners, apply penetrating oil. Gradually applying force protects hardware from stripping or damage.
Remove the Wheel
Disengage locks or brakes before lifting swivel casters. Gently lift or pry the wheel from the mount. Avoid forcing it, which can damage bearings, forks, or mounting plates. Controlled removal protects both the caster and the equipment.
Inspect Components
After removal, check the wheel, fork, bearings, and mounting hardware for wear or damage after removal. Catching issues now prevents future downtime and ensures smooth operations. Replace any damaged parts before reinstalling or installing new casters.
Following these steps can improve equipment uptime and reduce the risk of unplanned maintenance events. Next, let's discuss the common mistakes that occur during caster wheel removal.
Common Mistakes to Avoid During Caster Wheel Removal
Even experienced workers can make errors that can lead to damaged mounting points, broken casters or costly repairs. Common errors include:
Skipping equipment stabilization: Working on an unstable cart or machine increases the risk of injuries and damage. Always secure the load before loosening any fasteners to prevent unexpected movement and avoid unplanned downtime.
Using the wrong tools: Mismatched wrenches, worn sockets, or improvised tools can strip bolts or damage mounting hardware. Proper tools help maintain equipment integrity and reduce the chance of rework or repair delays.
Applying excessive force: Forcing a stuck caster can bend forks, damage bearings, or stress the mounting plate. Penetrating oil and gradual pressure provide a safer way to free components without creating new issues.
Ignoring the caster type: Different mounting systems, stem, plate, or specialty locks, require different removal techniques. Treating them the same can result in damaged parts and longer equipment downtime.
Skipping post-removal checks: Not inspecting forks, bearings, or mounting surfaces often leads to hidden failures later. A quick check ensures components are ready for replacement or reinstall, supporting better uptime and smoother operation.
Avoiding these mistakes supports KPIs such as downtime reduction, scrap rate minimization, and cost per unit control. Next, let's examine proper maintenance practices to ensure longevity.
Maintenance Tips After Removing the Caster Wheel
Once a caster wheel is removed, proper maintenance ensures smooth reinstallation and long-term performance.
Clean Components: Remove dirt, debris, and old grease from the wheel, fork, and mounting areas. A clean surface prevents early wear and ensures smooth reinstallation.
Lubricate Bearings: Apply industrial lubricant to bearings and swivel parts. Proper lubrication lowers friction and stabilizes equipment movement.
Inspect for Wear: Check forks, wheels, and mounting points for cracks, bent parts, or worn surfaces. Early detection helps reduce unplanned downtime and prevents failures.
Document Maintenance: Record all maintenance actions, replaced parts, and issues found. Clear documentation improves traceability and helps plan predictive maintenance.
These practices help reduce lead time variability and prevent unplanned operational stoppages.
How Humphries Casters and Supplies Can Make the Process Easier?
Working with a trusted supplier like Humphries Casters and Supplies can simplify caster maintenance and removal. Their expertise helps you identify the right type, size, and material for your application.
Here’s how we can assist you:
Wide range of caster solutions: Offers industrial, commercial, medical, and specialty casters, ensuring you always get a compatible replacement. This reduces delays, supports equipment uptime, and simplifies sourcing for busy maintenance teams.
Technical guidance from experienced specialists: Helps you choose the right caster type, mounting style, and tools for safe removal and installation. This lowers the risk of improper handling and supports smoother maintenance workflows.
Custom manufacturing when needed: Works with 400+ global factories to produce casters or components that aren’t readily available. This supports long-term reliability and reduces procurement bottlenecks for unique equipment.
Reliable support trusted by top organizations: Decades of experience with leading manufacturers, hospitals, and care facilities ensure dependable service. This helps maintenance teams resolve issues faster and maintain consistent operational performance.
Collaborating with a supplier like Humphries helps reduce downtime, supports cost-efficient maintenance, and ensures safe, effective caster wheel handling.
Conclusion
Removing caster wheels safely and effectively requires preparation, the right tools, and attention to detail. Following step-by-step procedures, avoiding common mistakes, and maintaining equipment afterward helps reduce downtime, supports consistent throughput, and improves equipment longevity.
Post-removal maintenance, including cleaning, lubrication, and inspections, further supports long-term performance. Consulting experienced suppliers like Humphries Casters and Supplies ensures access to the right wheels, tools, and expert guidance, making the process smoother and safer.
For assistance with your caster removal, replacement, or maintenance needs, reach out to us today.
FAQs
1. How do I identify the type of caster wheel before removal?
Check how the caster attaches to the furniture or equipment. Look for a stem, plate, or threaded mount. Measure the stem size, inspect the mounting style, and note wheel material. This helps you choose the right removal method and avoid unnecessary damage.
2. What lubricant is recommended for easing the removal of stuck caster wheels?
Use a light penetrating lubricant such as WD-40 or a silicone-based spray. Apply it around the stem or mounting area, let it sit for a few minutes, and then gently twist or pull the caster. This loosens grime and rust without harming the parts.
3. How do I deal with rusted or corroded caster wheels that won't come off easily?
Apply a penetrating oil, let it soak, and gently tap around the mount to break the corrosion. Use pliers or a pry tool with controlled pressure. If rust is severe, heat from a hairdryer or rust dissolver can help free the wheel safely.
4. How can I remove caster wheels from antique furniture without damaging the wood?
Use minimal force and protect the wood with a cloth or thin padding. Apply a small amount of lubricant to loosen the stem, then wiggle the caster out slowly. Avoid metal tools directly on the surface to prevent scratches, dents, or finish damage.
5. How do I store removed caster wheels if I plan to reuse them?
Clean the wheels, remove dust or grease, and store them in labeled bags or containers. Keep all screws and hardware together. Place them in a dry, cool area to prevent rust and warping so the casters remain ready for future use.