For procurement managers, plant heads, and operations leaders, even small equipment issues can cause major disruptions. Equipment that wobbles, furniture that drags, and carts that fail under load can slow production, increase maintenance time, and even cause workplace injuries. Over time, these issues add unexpected downtime, raise repair costs, and create safety hazards that directly impact throughput and operational efficiency.
Properly attaching stem casters addresses these challenges before they escalate. When mounted correctly, stem casters support weight consistently, improve mobility, and reduce stress on equipment. With the global caster market set to reach USD 6.9 billion by 2026, ensuring correct installation is essential for getting reliable, long-lasting performance.
By focusing on precise placement, choosing the right stem type, and following reliable procedures, teams can reduce risk and improve day-to-day operations without adding complexity to their processes. In this blog, we’ll provide a practical, step-by-step approach to attaching stem casters correctly, helping you avoid common mistakes and optimize performance.
In a nutshell:
Properly attaching stem casters ensures stable, smooth, and safe equipment movement while reducing stress on frames and maintaining load distribution.
Selecting the right stem type and matching it to equipment, load, and floor conditions is critical for performance, safety, and longevity.
Thorough preparation, accurate measurement, correct installation, and post-installation testing prevent wobble, uneven wear, and operational downtime.
Awareness of common mistakes like misalignment, insufficient surface prep, or improper tightening improves reliability, reduces maintenance, and enhances equipment lifespan.
What are Stem Casters?
Stem casters are wheels with a mounting stem that fits into pre-drilled holes or threaded sockets on furniture or equipment. Unlike plate casters, which are mounted with screws and brackets, stem casters provide a simpler, often more compact solution.
Here’s why stem casters matter:
Mobility and Stability: Stem casters enable equipment to move smoothly while keeping it stable and balanced. They maintain proper weight distribution, reduce strain on frames, and improve operator safety.
Structural Support: When installed correctly, stem casters prevent wobble, misalignment, and uneven rolling. This protects the equipment frame, reduces stress on connection points, and ensures consistent load performance.
Operational Efficiency: Poor installation leads to loose stems, faster wear, dragging, or sudden failures. These issues increase downtime and maintenance demands, impacting productivity and workflow efficiency.
Floor and Noise Protection: When matched to the floor type, stem casters reduce surface damage and rolling resistance. They also support quieter movement, which is important in hospitals, manufacturing facilities, and high-traffic areas.
Equipment Longevity: The right caster and proper installation help maintain load ratings, reduce tipping risks, and extend the life of both the caster and the equipment. This reduces long-term replacement and repair costs.
In the following section, let’s break down the essential components that make up a stem caster.
Key Components of Stem Casters
Stem casters are composed of several essential components that work together to carry loads and enable smooth mobility. The main components include:
Wheel: Supports the load and determines how smoothly the equipment rolls. Material choice affects floor protection, noise level, and long-term wear, making it important for maintaining consistent equipment movement and reducing strain on operators.
Stem: This mounting shaft connects the caster directly to your equipment. Its size, type, and fit directly influence load stability and how well the caster stays seated during use, especially under frequent movement or vibration.
Bearing: Located inside the wheel to enable smooth rotation. The bearing type impacts rolling resistance, ease of maneuvering, and how well the caster performs under continuous or high-load conditions.
Caster Housing (Fork): The housing holds the wheel and allows it to swivel when needed. Strong housing ensures even load distribution, minimizes wobble, and reduces stress on equipment frames during movement.
Locking Mechanism (Optional): Some stem casters feature a lock that keeps your equipment stationary. Reliable locks prevent unintended movement and support safer operation during loading, unloading, or maintenance tasks.
Each component impacts performance metrics like downtime, load distribution, and floor protection. By verifying these components before purchase or installation, you can avoid mismatches, weak mounts, and unsafe setups.
Next, let's explore the different stem caster types and which applications they suit best.
Types of Stem Casters
Stem casters come in different styles to match various mounting requirements and operational conditions. Choosing the right type ensures optimal performance and safety.
Common types include:
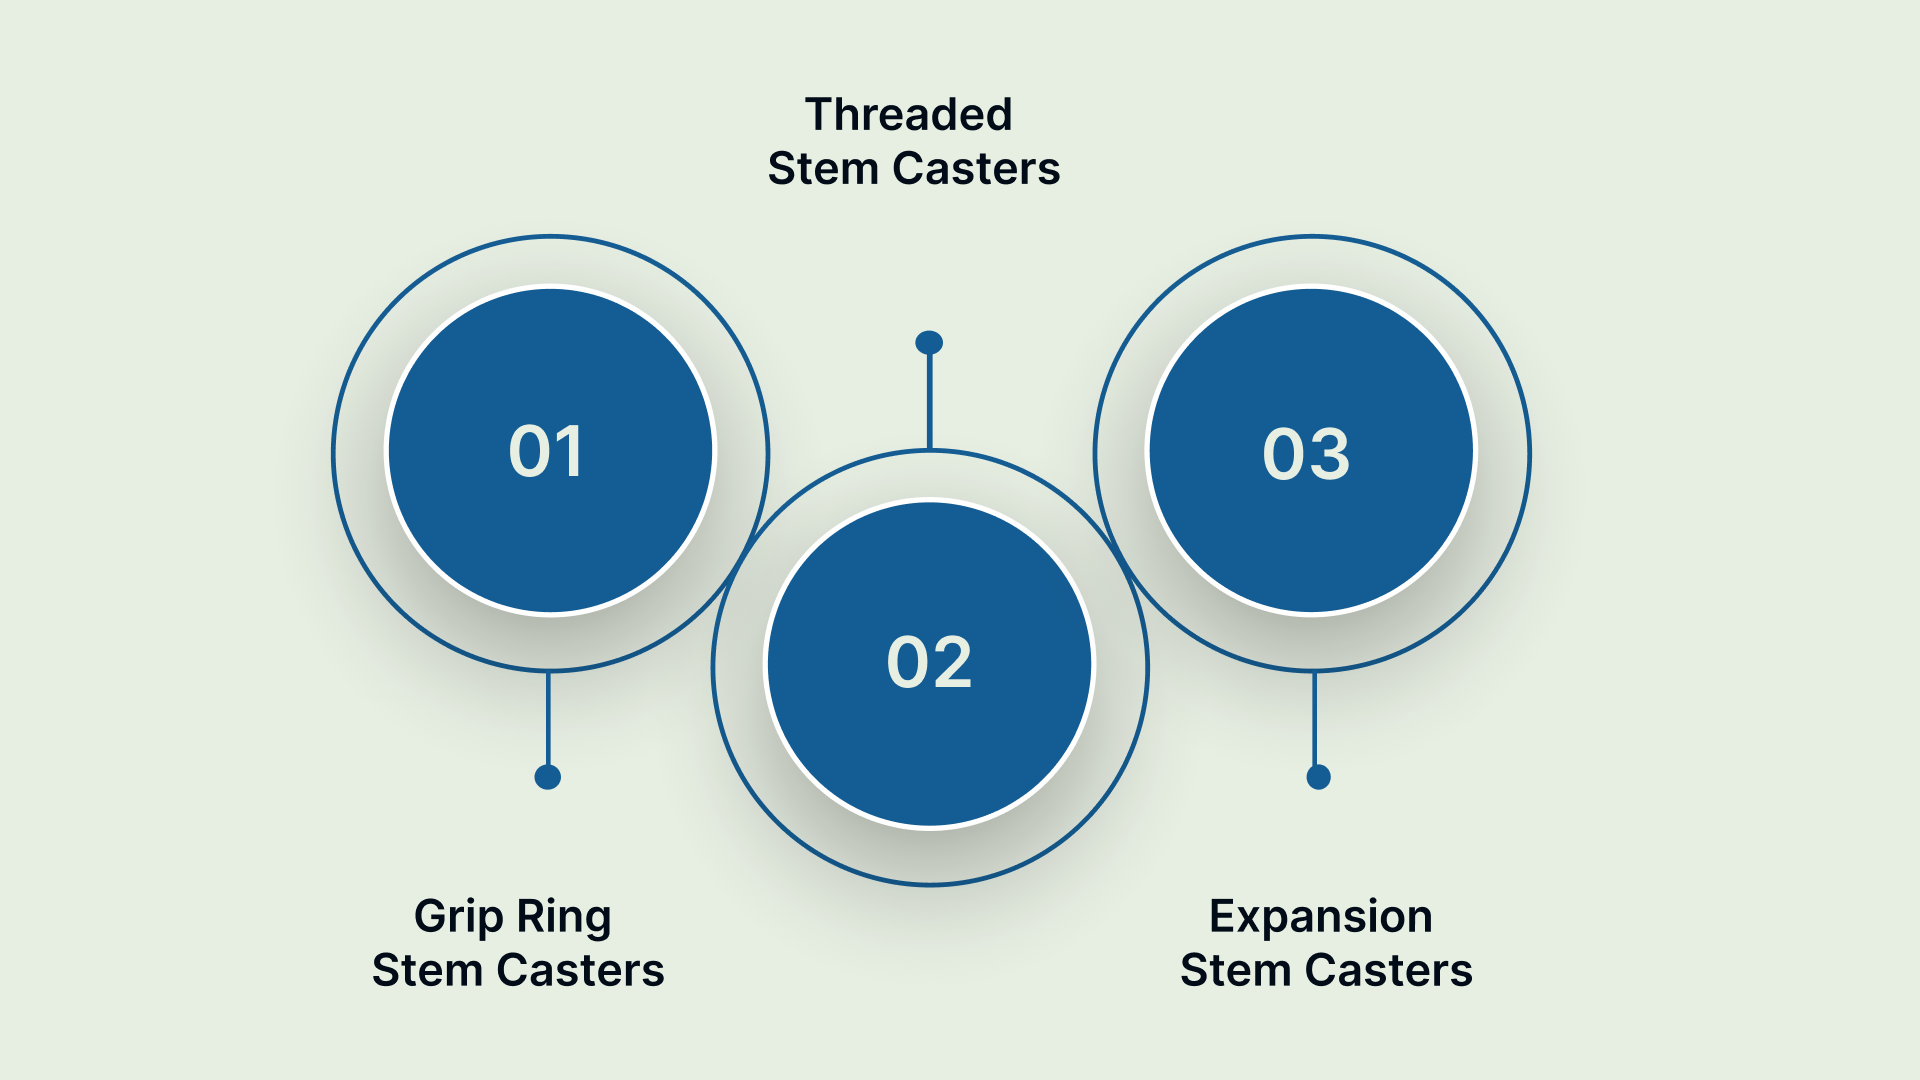
Grip Ring Stem Casters
Grip ring casters use a smooth cylindrical stem with a metal or plastic ring that compresses into the mounting socket. Once inserted, the ring expands and locks the caster in place. They install quickly and are common in light- to medium-duty applications.
Ideal use-case scenario: Best for carts, medical stands, office equipment, and furniture with pre-installed socket sleeves.
Avoid when: The equipment handles heavy loads or has no compatible metal/plastic socket to secure the ring.
Threaded Stem Casters
Threaded stems feature external threads that tighten into a nut or threaded insert, offering a strong and reliable connection. They provide better stability for heavier equipment compared to grip ring stems.
Ideal use-case scenario: Suitable for machinery bases, industrial workstations, equipment with metal frames, and any application requiring secure fastening.
Avoid when: The frame material is soft or thin, making it unable to support a threaded insert or nut.
Expansion Stem Casters
Expansion stems feature a rubber or plastic sleeve that expands when you tighten the bolt inside the stem. This creates a firm internal grip inside round or square tubing. You’ll often find these used when drilling through the frame isn’t preferred.
Ideal use-case: Best for tubular-framed carts, scaffolding, laboratory frames, and equipment with hollow legs.
Avoid when: The mounting tube is damaged, misshaped, or too thin to support internal expansion pressure.
Choosing the right type reduces the risk of loosening, uneven load distribution, and equipment instability. In the next section, let's discuss the tools and materials that make installation smooth and accurate.
Tools and Materials Required for Attaching Stem Casters
Before you start the installation, gather all the necessary tools and materials to keep the process smooth. Preparing in advance helps you work faster, avoid mistakes, and install casters accurately.
Common requirements include:
Drill and Drill Bits: Choose bits that match the diameter of pilot holes for grip ring, threaded, or expansion casters. Accurate drilling prevents loosening and equipment damage.
Measuring Tape and Marking Tools: Use these to mark precise caster locations. Proper measurements keep casters aligned, stable, and evenly loaded.
Rubber Mallet or Hammer: Useful for gently tapping grip ring casters into place without damaging the stem or mounting surface.
Wrenches or Socket Set: Required for tightening threaded stems or expansion mechanisms securely. Applying the correct torque prevents loosening under load.
Screwdriver: Needed for equipment with mounting plates or for securing nuts and washers on certain threaded casters.
Cleaning Supplies (Cloth, Degreaser): Prepare the mounting surface by removing dust, grease, or residue. A clean surface ensures a snug fit and reduces wobble.
Level and Square: Helps verify alignment and symmetry of casters, preventing uneven wear and maintaining equipment stability.
Preparation ensures the installation is efficient, minimizes downtime, and supports proper caster performance. Next, let's examine the step-by-step process for securely attaching stem casters.
Step-By-Step Guide: How to Properly Attach Stem Casters
Proper installation of stem casters is essential for safe, stable, and efficient equipment operation. Following a step-by-step approach helps you mount each caster securely, reducing wobble, uneven wear, and downtime.
This guide walks you through every stage of the process, from initial evaluation to post-installation verification.
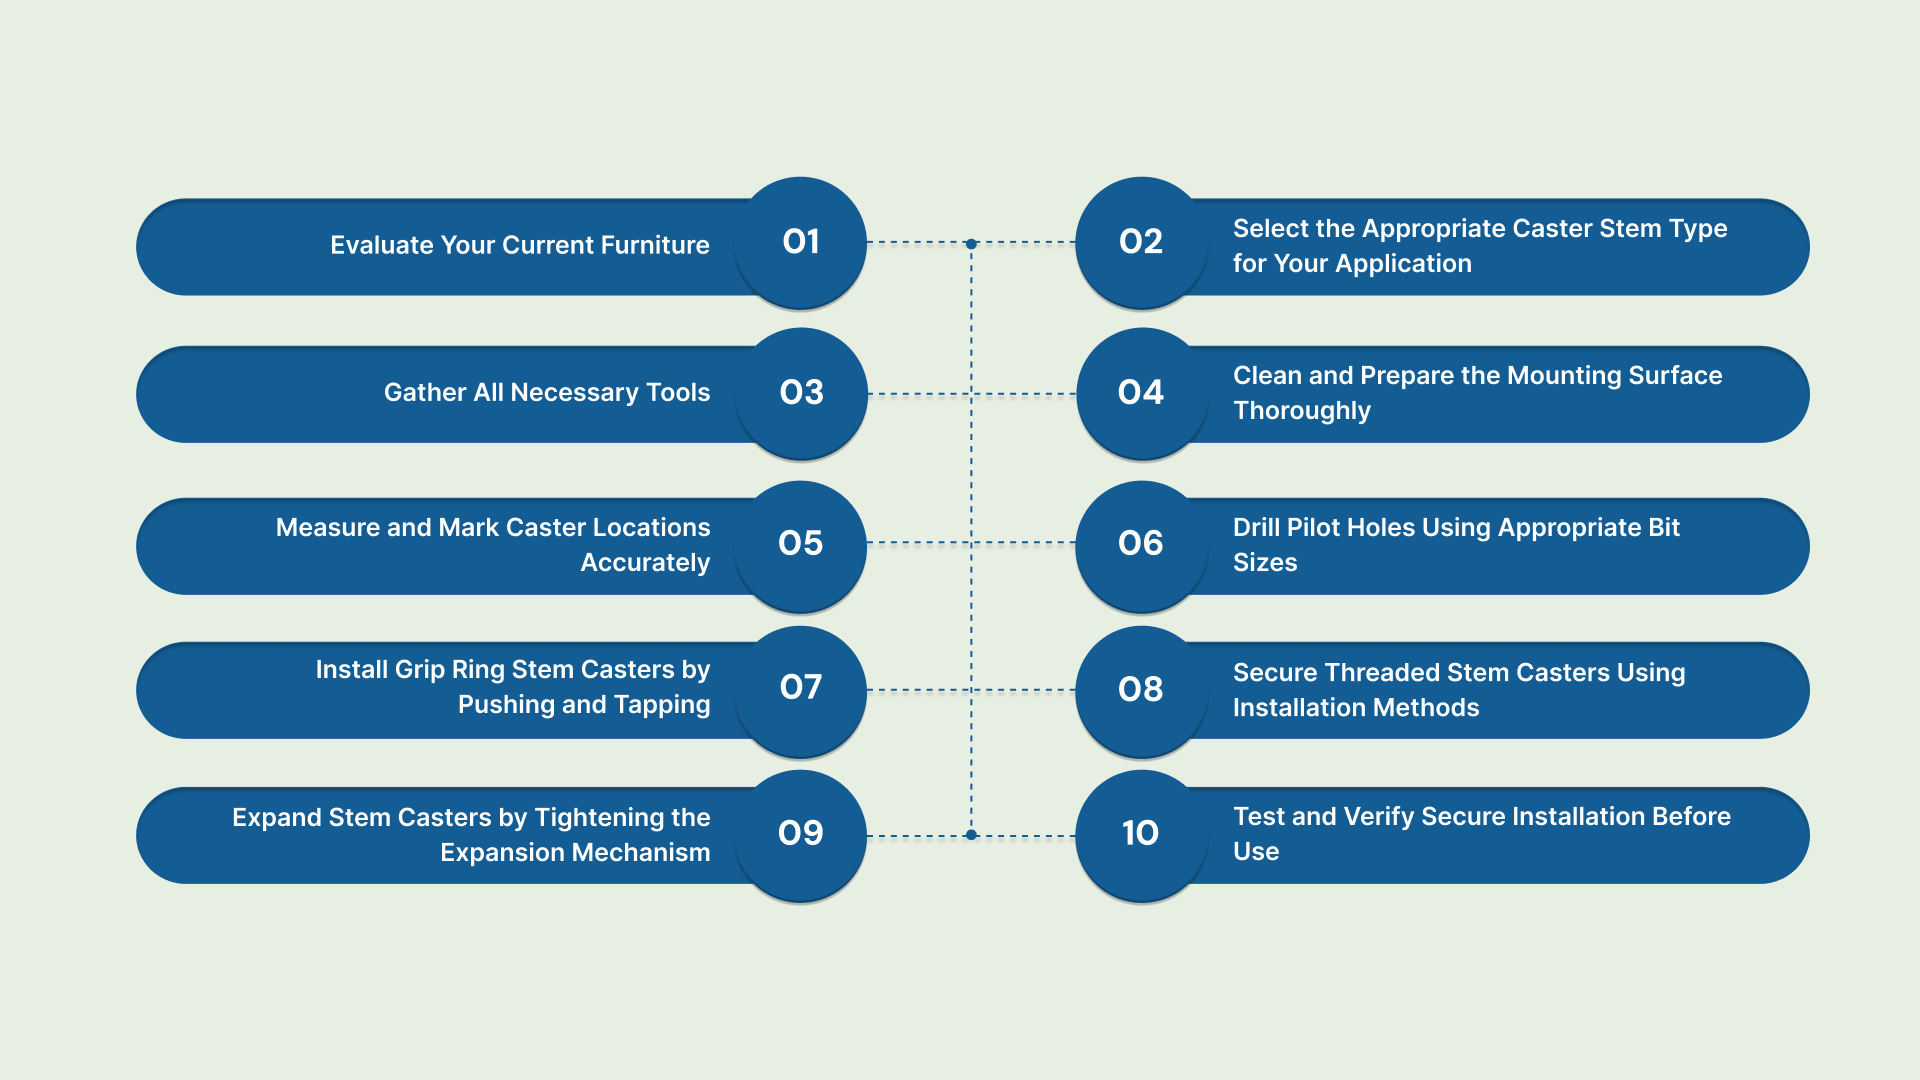
Evaluate Your Current Furniture or Equipment
Before you attach stem casters, assess your equipment to confirm compatibility and safety. Evaluating the structure now helps you avoid damage and operational problems later.
Inspect Surface Integrity: Check mounting areas for cracks, uneven surfaces, or weaknesses that could compromise caster attachment.
Assess Load Requirements: Determine the maximum weight the equipment will carry to ensure the chosen casters can handle the load safely.
Check Existing Mounting Options: Identify pre-drilled holes, sockets, or inserts to select compatible stem types.
A careful evaluation at this stage helps prevent future instability, unnecessary maintenance, and safety hazards.
Select the Appropriate Caster Stem Type for Your Application
Choosing the right stem type is key to securing attachment and optimal performance. The stem type affects load distribution, stability, and mobility.
Match Load and Mobility Needs: Use grip ring stems for lighter loads, threaded stems for heavier loads, and expansion stems for a strong hold on solid surfaces.
Consider Floor Surface and Use Frequency: Softer wheels may reduce floor damage, while swivel mechanisms improve maneuverability.
Confirm Compatibility: Ensure the stem size and type fit the mounting socket or hole precisely.
Correct stem selection minimizes the risk of loosening, extends service life, and keeps your equipment safe.
Gather All Necessary Tools and Materials Before Starting
Efficiency and accuracy in installation depend on having all required tools and materials ready. Preparation reduces interruptions, prevents errors, and ensures each step is completed effectively.
Drill and Bits: Select sizes suitable for pilot holes based on the stem type and mounting surface.
Hand Tools: Wrenches, mallets, and screwdrivers allow secure installation and adjustment.
Cleaning Supplies and Measurement Tools: Cloths, degreaser, measuring tape, and levels help prepare surfaces and ensure precise placement.
Having all tools at hand allows for a smooth workflow and reduces the likelihood of errors or misalignment.
Clean and Prepare the Mounting Surface Thoroughly
Cleaning and flattening the mounting surface helps casters sit flush and spread the load evenly. Skipping this step can cause instability, uneven wear, or equipment damage.
Remove Debris and Grease: Use a degreaser and cloth to clear dust, grease, or old adhesives from the surface.
Inspect for Surface Defects: Look for cracks, dents, or uneven areas that may prevent secure seating.
Level the Surface: Sand or adjust surfaces if necessary to ensure flat contact for the stem.
A well-prepared surface ensures long-term stability and prevents premature caster failure.
Measure and Mark Caster Locations Accurately
Accurate placement of casters prevents equipment imbalance, reduces stress on mounts, and ensures smooth mobility. Careful measurements ensure consistent performance.
Determine Symmetry: Use a measuring tape and a square to ensure casters are evenly positioned on each corner.
Mark Pilot Points: Clearly indicate the center of each mounting location for drilling or insertion.
Double-Check Alignment: Verify that markings are parallel and consistent to prevent uneven load distribution.
Marking carefully keeps casters aligned, maintains equipment stability, and extends their lifespan.
Drill Pilot Holes Using Appropriate Bit Sizes
Pilot holes help you insert stems properly and reduce the risk of damaging equipment or casters. Using the correct drill size and depth is essential.
Select Correct Drill Bit: Match the bit size to the stem type—slightly smaller for grip ring or expansion stems, exact for threaded stems.
Ensure Accurate Depth: Drill to the recommended depth to allow full insertion without protrusion.
Check Hole Alignment: Confirm each pilot hole is straight and positioned according to markings.
Proper drilling secures the caster, reduces installation stress, and promotes consistent performance.
Install Grip Ring Stem Casters by Pushing and Tapping
Grip ring casters rely on friction rings for secure placement. Correct installation avoids damaging the stem or mounting surface.
Insert Stem Carefully: Align the stem with the pilot hole and apply steady pressure.
Tap Lightly: Use a rubber mallet to seat the stem without over-hammering.
Check Stability: Ensure the caster is flush and spins freely without wobble.
Well-installed grip ring casters maintain stability and mobility for light to medium loads.
Secure Threaded Stem Casters Using Installation Methods
Threaded stems provide a strong mechanical connection. Choose the method based on your equipment and surface type.
Direct Threading: Screw into a pre-tapped hole or threaded insert for secure mounting.
Nut and Washer Method: Pass the threaded stem through a hole and tighten a nut and washer for stability.
Confirm Tightness: Avoid over- or under-tightening to maintain balance and prevent loosening during use.
A strong threaded connection ensures safe operation under higher loads and frequent movement.
Expand Stem Casters by Tightening the Expansion Mechanism
Expansion stems use an internal mechanism to grip the mounting hole when tightened. Proper expansion ensures stability for heavy-duty equipment.
Insert Stem: Place the stem into the prepared mounting hole.
Tighten Mechanism: Adjust the expansion bolt to create uniform pressure against the hole.
Check Grip: Ensure the caster does not move and is firmly seated.
Fully expanded casters provide a strong, stable mount for heavy equipment, reducing maintenance and downtime.
Test and Verify Secure Installation Before Use
Verifying installation keeps equipment safe and ensures optimal performance. Testing identifies issues before equipment goes into service.
Apply Weight Gradually: Confirm casters hold the load without tilting or shifting.
Test Mobility: Roll the equipment to ensure smooth movement and proper swiveling.
Inspect Connections: Check all stems for tightness and alignment, adjusting if necessary.
Testing prevents accidents, minimizes downtime, and ensures casters perform safely and efficiently.
In the following section, let's look at common mistakes and how to avoid them for long-term reliability.
Common Installation Mistakes in Attaching Stem Casters
Even experienced teams make mistakes during installation. Identifying and correcting them is crucial to maintaining uptime and safety. Common mistakes include:
1. Incorrect Stem Type Selection
Choosing the wrong stem type can lead to instability, uneven load distribution, or premature wear. Selecting a caster that doesn’t match the equipment or load requirements reduces mobility efficiency and increases maintenance needs.
How you can fix it:
Evaluate the load, floor type, and frequency of movement before selecting a stem.
Verify that the mounting hole or socket matches the intended stem type.
Replace any incorrectly chosen casters with the appropriate stem type to secure stability.
2. Misaligned Caster Placement
Improperly positioned casters cause wobbling, uneven stress, and reduced equipment lifespan. Misalignment also increases the risk of accidents and downtime.
How you can fix it:
Measure and mark mounting locations precisely using a tape measure and a square.
Use a level to confirm that all casters sit flush and evenly.
Adjust positions before drilling pilot holes to ensure perfect alignment.
3. Insufficient Surface Preparation
A dirty or uneven mounting surface prevents casters from seating properly, leading to instability and faster wear. Neglecting this step can compromise safety and mobility.
How you can fix it:
Thoroughly clean the mounting surface of dust, grease, or debris.
Sand or smooth uneven surfaces to ensure flush installation.
Inspect the area for cracks or weak spots and reinforce if necessary.
4. Over-Tightening or Under-Tightening Stems
Applying too much or too little torque during installation can damage equipment or allow casters to loosen over time. Both over-tightening and under-tightening affect stability and load-bearing capacity.
How you can fix it:
Follow manufacturer torque specifications for each stem type.
Use the appropriate tools to control the force applied.
Recheck stem tightness after initial movement and readjust as needed.
5. Skipping Post-Installation Testing
Failing to test installed casters can hide alignment issues or loose connections, increasing downtime and risk of equipment damage.
How you can fix it:
Apply pressure and move the equipment to test stability and caster function.
Inspect each caster for wobble, uneven load distribution, or loosening.
Address any issues immediately before putting the equipment into regular use.
Addressing these mistakes improves equipment uptime, load reliability, and reduces repair costs.
How Humphries Casters and Supplies Ensures Safe and Easy Stem Caster Installation?
Humphries Casters and Supplies provides a broad range of casters, replacement parts, and material handling solutions tailored to your operational needs. With decades of experience, they offer casters suitable for diverse applications.
Here’s how we can support you:
Extensive Selection: Humphries offers a wide range of casters and wheels, ensuring the right stem type and wheel size for any equipment. This variety supports proper load distribution and reliable mobility.
Custom Manufacturing: If a standard caster doesn’t fit your requirements, Humphries can create custom solutions, helping reduce downtime and maintain operational efficiency.
Expert Support: Their team provides practical guidance on selection, installation, and troubleshooting, helping ensure secure installation and safer equipment handling.
Trusted Reliability: With over 27 years of family-owned service and partnerships with more than 400 factories, Humphries delivers dependable products and support for industrial, commercial, medical, and educational applications.
Operational Impact: By providing quality products and hands-on support, Humphries helps minimize maintenance interventions, improve equipment uptime, and enhance workplace safety.
By working with Humphries, you can streamline procurement, reduce supplier risk, and rely on casters that meet both mobility and safety demands.
Conclusion
Correct stem caster installation is crucial for safe, efficient equipment operation. It supports load stability, reduces wear, and minimizes downtime. Key steps include selecting the appropriate stem, preparing the mounting surface, accurately installing the caster, and performing post-installation checks.
Following these practices reduces operational risks, helps maintain equipment uptime, and supports safer workplace operations. Partnering with experts like Humphries Casters and Supplies ensures access to quality casters, installation guidance, and tailored solutions to meet your specific operational needs.
If you want casters selected or supplied to match your load, base type, and floor conditions, check what Humphries Casters and Supplies offers. Feel free to reach out to us to discuss your requirements.
FAQs
How do you prepare the furniture or equipment surface for stem caster installation?
Clean the mounting area thoroughly, remove dust, debris, or old hardware, and ensure the socket or hole is the correct size. For wooden surfaces, pre-drill a hole if needed to prevent splitting and ensure a snug, secure fit for the caster stem.
What is the difference between stem casters and plate casters?
Stem casters attach via a single stem inserted into a socket or hole, while plate casters mount using a flat plate secured with multiple screws. Plate casters provide higher stability and weight support, whereas stem casters are easier to install and are often used for lighter furniture or equipment.
Are there any weight capacity considerations for stem casters?
Yes, each stem caster has a maximum weight capacity based on its size, material, and design. Exceeding this limit can damage the caster, furniture, or floor, so always check manufacturer specifications and distribute weight evenly across all casters.
Can stem casters be installed in hollow tubing or irregular shaped sockets?
Stem casters can be installed in hollow or irregular sockets if an adapter, insert, or bushing is used to create a secure fit. Without proper support, the caster may wobble, loosen, or fail under load.
Can stem casters be installed on wooden furniture? If so, how?
Yes, stem casters can be installed on wood. Pre-drill a hole slightly smaller than the stem diameter, then insert the caster firmly. For extra stability, use a threaded insert or adhesive if the wood is soft or prone to splitting.