The relentless pressure of maintaining a sterile environment often rests on your Environmental Services (EVS) teams. Every surface, every piece of equipment, poses a potential risk.
For Materials Management Directors and Facility Leaders, the constant movement of medical carts presents a unique infection control challenge. These carts travel throughout the facility, moving between patient rooms and storage areas.
A breakdown in your sterilization protocol can rapidly lead to increased Hospital-Acquired Infections (HAIs). This jeopardizes patient safety and creates significant compliance risks for your facility.
In this comprehensive guide, we provide a structured, step-by-step workflow for EVS teams. You will learn precisely how to sterilize medical carts to meet the strictest healthcare standards, protecting both patients and staff.
An Overview:
Always clean the cart using soap and water before attempting disinfection or sterilization. Disinfectants cannot penetrate surface dirt.
The most common mistake is failing to observe the manufacturer’s required wet contact time (dwell time).
Ensure your disinfectant is compatible with the cart material, especially plastics, hardware, and specialized caster wheels.
Prioritize complex areas like keyboard trays, handles, drawers, and the casters themselves, as these areas harbor the most pathogens.
Implement a clear tagging and sign-off system to verify when a cart was last cleaned and by whom for audit purposes.
Use mobile, powered tools or ergonomic carts to reduce the physical strain on staff performing deep cleaning procedures.
Why Medical Cart Sterilization Matters
Medical carts are essential mobile workstations, but their mobility makes them vectors for microbial contamination. They are often designated "high-touch surfaces" requiring stringent decontamination. A lapse in protocol threatens patient health and the financial stability of the institution.
Proper sterilization is non-negotiable for three core reasons:
Patient Safety: Eliminates pathogens that cause healthcare-acquired infections and hospital-spread outbreaks.
Compliance: Meets CDC, OSHA, and state infection control standards to avoid fines or accreditation loss.
Equipment Protection: Extends cart lifespan by preventing rust, corrosion, and material degradation from improper cleaning.
Staff Accountability: Clear protocols reduce errors, improve consistency, and document due diligence in case of infection investigations.
Once the importance of the procedure is clear, you can implement the standardized, step-by-step workflow for comprehensive disinfection.
Step-by-Step Medical Cart Sterilization Process
This protocol ensures thorough decontamination, moving from the least soiled to the most contaminated areas and from cleaning to sterilization. Skipping any step reduces effectiveness and increases infection risk.
Follow these steps to sterilize your medical cart:
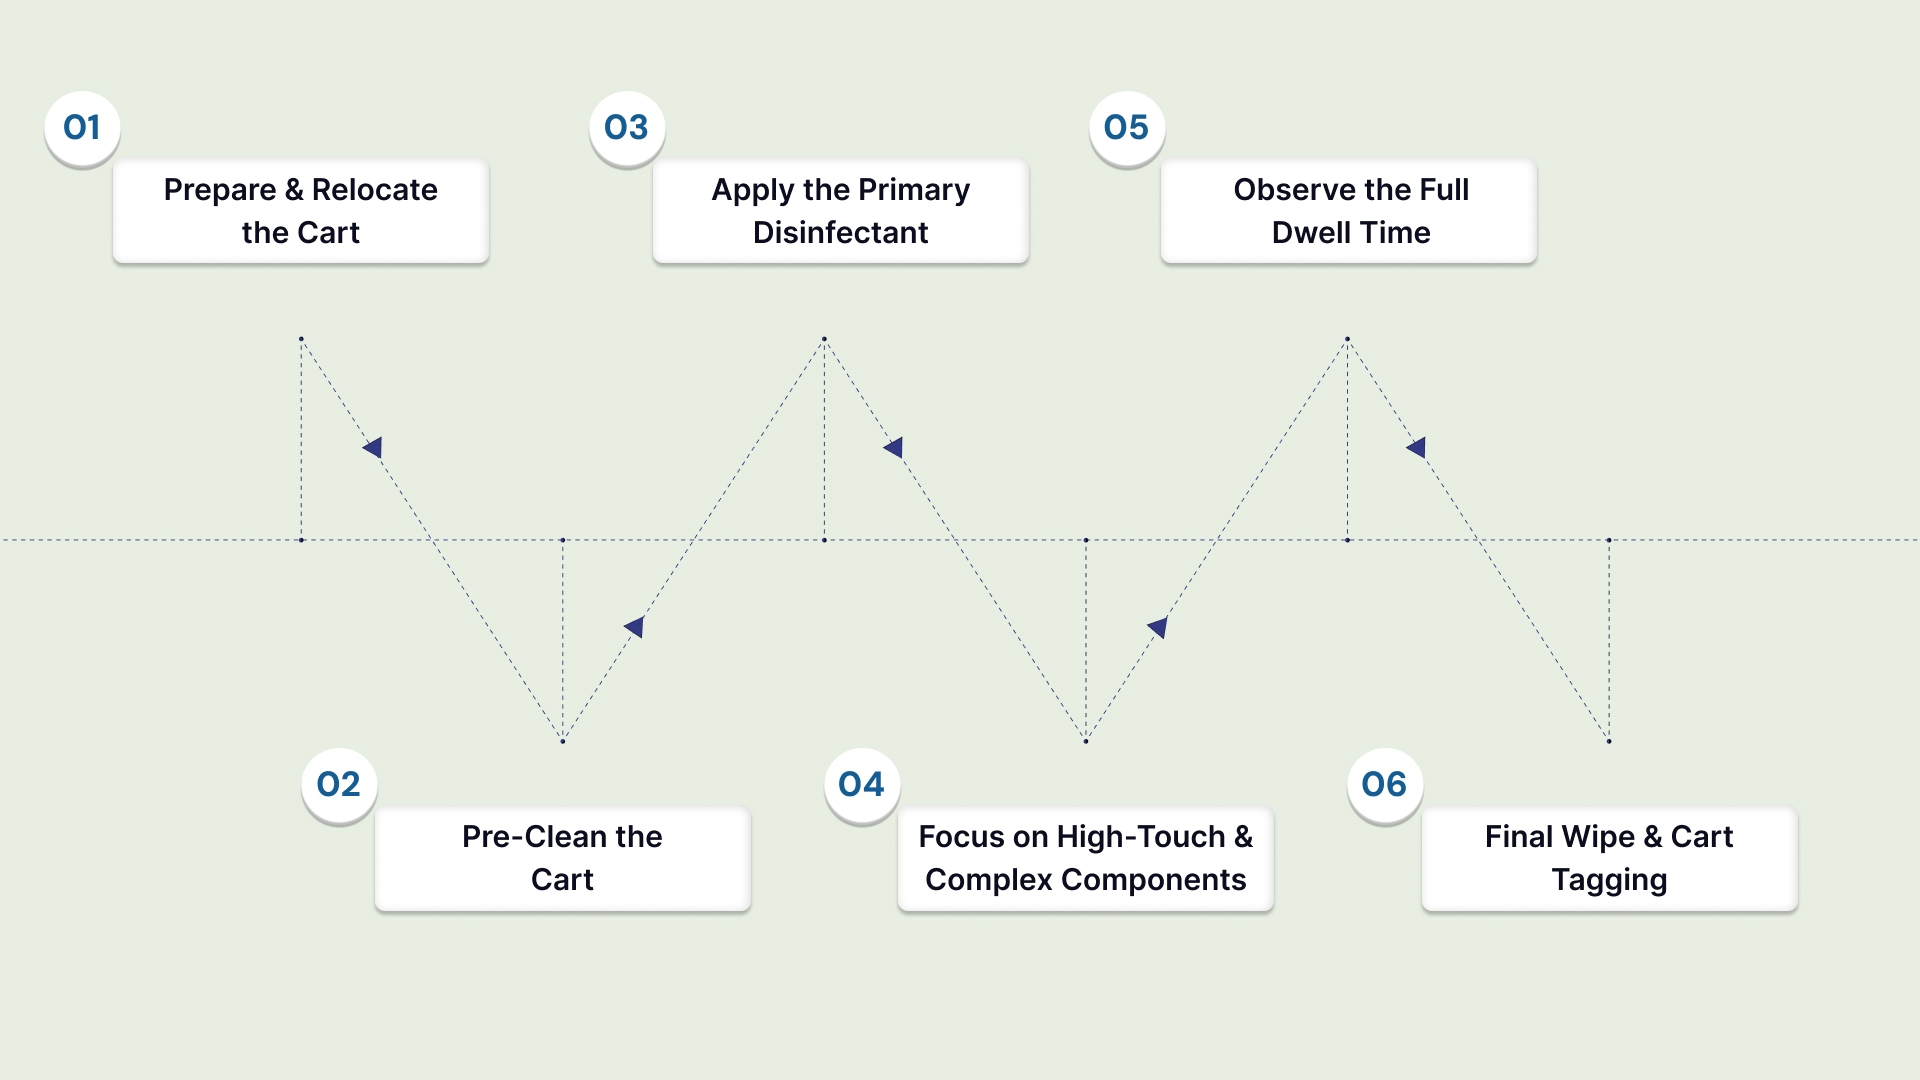
Step 1: Prepare and Relocate the Cart (The Pre-Cleaning Phase)
Action: Move the cart to the designated, secure cleaning area. Remove all items from drawers and shelves, placing supplies in designated storage bins. Unplug all power cords.
Why It Matters: This step prevents cross-contamination of supplies and ensures access to all surfaces. You cannot effectively clean a cart while it is still actively being used.
Expectation: The cart should be empty and stationed in a cleanable, defined workspace. The cleaning team should be fully donned in appropriate PPE.
Step 2: Pre-Clean the Cart (The Critical Initial Wash)
Action: Use a microfiber cloth saturated with a non-abrasive, neutral detergent and water solution. Thoroughly wipe down the entire cart surface, paying attention to visible dirt.
Why It Matters: This step is crucial because disinfectants are deactivated by organic matter (blood, dirt, bodily fluids). Cleaning physically removes these materials, allowing the disinfectant to work.
Expectation: The cart should be visually free of all dust and debris. Rinsing is generally not required unless the detergent leaves a heavy residue.
Step 3: Apply the Primary Disinfectant (The Saturation Phase)
Action: Apply the EPA-registered, hospital-grade disinfectant to all exterior surfaces using the prescribed method (spray, wipe, or saturation). Start from the top surfaces and work downwards.
Why It Matters: Moving from top to bottom prevents contaminated runoff from dirtying areas already cleaned. Ensure complete saturation of high-touch points like handles and rails.
Expectation: The entire cart surface should be visibly wet with the chosen disinfectant solution.
Step 4: Focus on High-Touch and Complex Components
Action: Reapply disinfectant or use specialized disinfectant wipes on critical areas. These include keyboard trays, monitor frames, caster assemblies, and the underside of drawers.
Why It Matters: Caster assemblies, where the wheel connects to the cart, are often overlooked but constantly contact floor pathogens. The human-machine interface is the highest risk area.
Expectation: These intricate areas have been cleaned, and the surfaces remain wet to begin the required dwell time.
Step 5: Observe the Full Dwell Time (The Efficacy Phase)
Action: Do not wipe the disinfectant off the cart. Allow the solution to remain visibly wet for the full "contact time" or "dwell time" specified by the chemical manufacturer.
Why It Matters: If you wipe the disinfectant too soon, the product will not have enough time to kill the required level of microorganisms. This renders the entire process ineffective.
Expectation: The designated time period (e.g., 5 minutes) must pass without the surface drying out. Re-wet the surface if it begins to dry prematurely.
Step 6: Final Wipe and Cart Tagging (The Completion Phase)
Action: Use a clean, dry cloth to wipe all surfaces of the cart dry. Attach the designated “Cleaned” or “Sterilized” tag, clearly noting the date, time, and EVS technician ID.
Why It Matters: Wiping removes chemical residue that could irritate skin or damage sensitive electronics. The tag confirms the cart's status and ensures audit readiness.
Expectation: The cart is dry, safe to use, and officially marked as ready for service.
While the six-step process focuses on general surface wiping, certain complex cart components require specialized application methods for deep decontamination.
Sterilization Methods for Medical Cart Components
While wiping is the most common method, certain cart components require different applications to achieve a high level of disinfection. The right method often depends on the cart's design and materials:
Choosing the application method based on surface type:
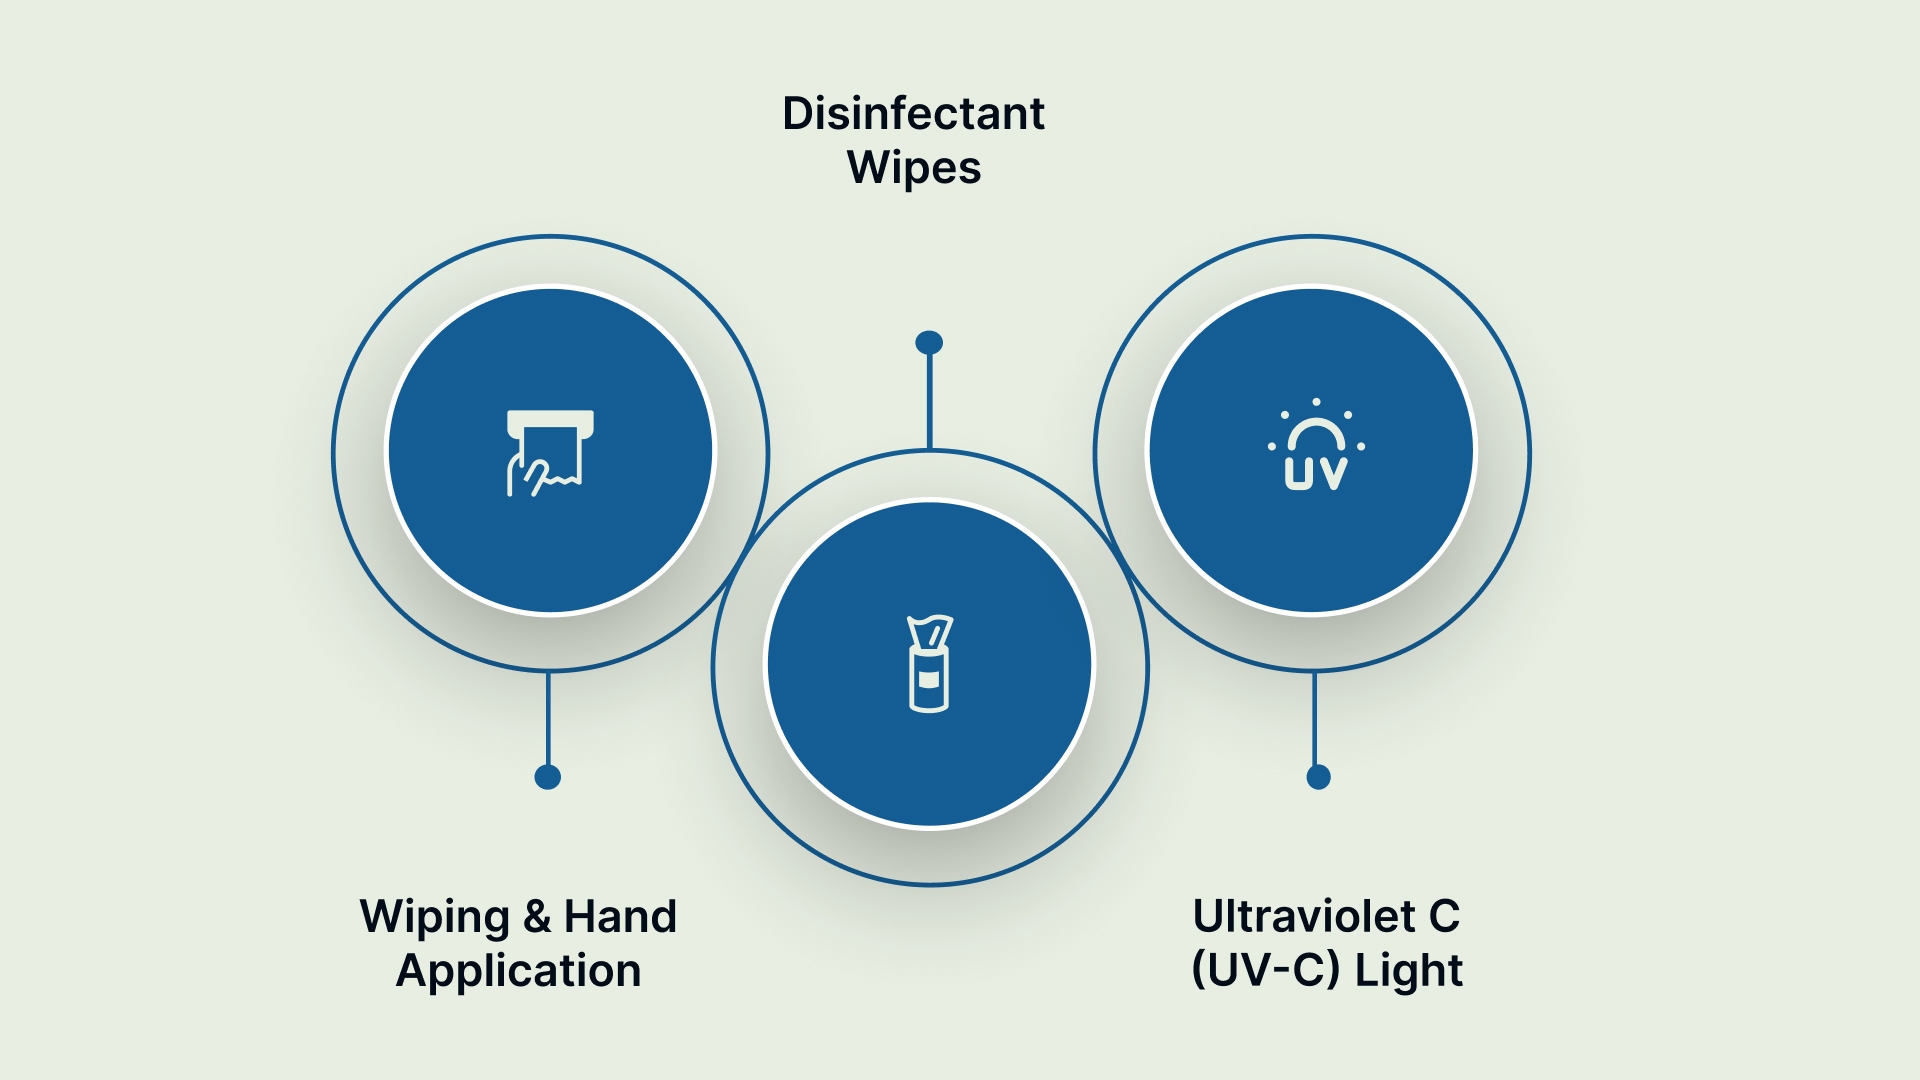
Wiping and Hand Application
This method is used for large, smooth, and flat surfaces, such as tabletops and side panels. It provides the most consistent contact pressure and visual verification of coverage. This is the standard procedure for general surface cleaning.
Disinfectant Wipes
Pre-saturated wipes are ideal for hard-to-reach areas and electronic components. Use these for keypads, monitor touchscreens, coiled cables, and drawer pulls. Wipes ensure you apply the correct dose and minimize liquid pooling around sensitive electronics.
Ultraviolet C (UV-C) Light
This is a no-touch technology used for rapid sterilization of large batches of equipment. It is excellent for terminal cleaning in designated decontamination rooms. However, UV-C is only effective if the light can physically reach the surface, meaning shadows limit its application.
Regardless of the method used, the chemical is only effective if left on the surface for the precise duration required by the manufacturer.
Critical Timing Factors: Contact Time and Dwell Time
Understanding the difference between contact time and dwell time is paramount to effective sterilization. These timing factors represent the required minimum duration for the disinfectant to kill pathogens.
Here's a breakdown:
Timing Factor | Definition | Implication for EVS Teams |
Contact Time | The minimum period the surface must remain visibly wet with the disinfectant. | If the cart dries before this time, you must reapply the solution. |
Dwell Time | The specific time required for the product to achieve its germicidal claim (e.g., to kill C. difficile spores). | This is dictated by the chemical label and must be strictly adhered to for compliance. |
This required time can vary greatly. Standard quaternary ammonium (quats) products may require 10 minutes, while newer hydrogen peroxide formulas may require only 1 minute. Always read the label.
Following the timing rules ensures the microbes are killed, but EVS directors need quantifiable data to prove that the protocol was successful.
How to Verify Your Cart is Actually Sterilized
Compliance officers and EVS directors must move beyond visual confirmation and implement verification checks. This ensures the protocol is consistently applied and provides hard data for audit trails.
Below are the reliable ways to confirm that your sterilization procedures are working effectively:
Visual Inspection: Examine the cart for remaining dirt, stains, or discoloration. Clean carts should appear visibly free of debris and organic matter.
Adenosine Triphosphate (ATP) Testing: ATP swabs measure organic residue on surfaces. Swab high-touch areas (handles, drawer edges) and compare to baseline standards. Results appear in 30 seconds.
Microbiological Culture: Send surface samples to a lab for bacterial culture. This takes 24-72 hours but confirms pathogen elimination. Reserved for validation studies, not routine use.
Documentation Review: Verify that contact time was followed and logged. Missing documentation suggests the protocol was not completed correctly.
Even with verification tools available, teams often fall victim to common procedural oversights that compromise sterility.
Common Mistakes in Medical Cart Sterilization
Even experienced EVS teams can make mistakes that compromise the entire sterilization process. Facility leaders must address these common pitfalls through clear training and standard procedures.
To maximize your compliance and effectiveness, look out for these frequent errors:
Skipping the Cleaning Step: Staff apply disinfectant directly to dirty carts. Organic matter shields pathogens from disinfectant contact. This is the most common and most dangerous error.
Using Wrong Disinfectant Concentration: Mixing too weak a solution fails to kill pathogens. Mixing too strong a solution wastes product and may damage materials. Always measure per label instructions.
Insufficient Contact Time: Rushing the dwell period leaves viable organisms. Contact time is not optional; it is a disinfectant requirement.
Cross-Contamination During Drying: Using dirty cloths to dry the cart reintroduces pathogens. Use only clean, lint-free cloths for final drying.
Ignoring Cart Damage: Cracks or corroded areas trap bacteria and cannot be adequately disinfected. Damaged carts require repair or replacement before returning to service.
No Documentation: Without records, you cannot prove compliance or identify protocol failures. Documentation is required for liability protection and accreditation audits.
Moving beyond simply avoiding mistakes requires implementing facility-wide program standards and continuous training.
Best Practices for Medical Cart Sterilization Programs
A strong sterilization process requires more than just good chemicals; it demands a structured program supported by management and integrated into facility operations.
These best practices drive compliance and results:
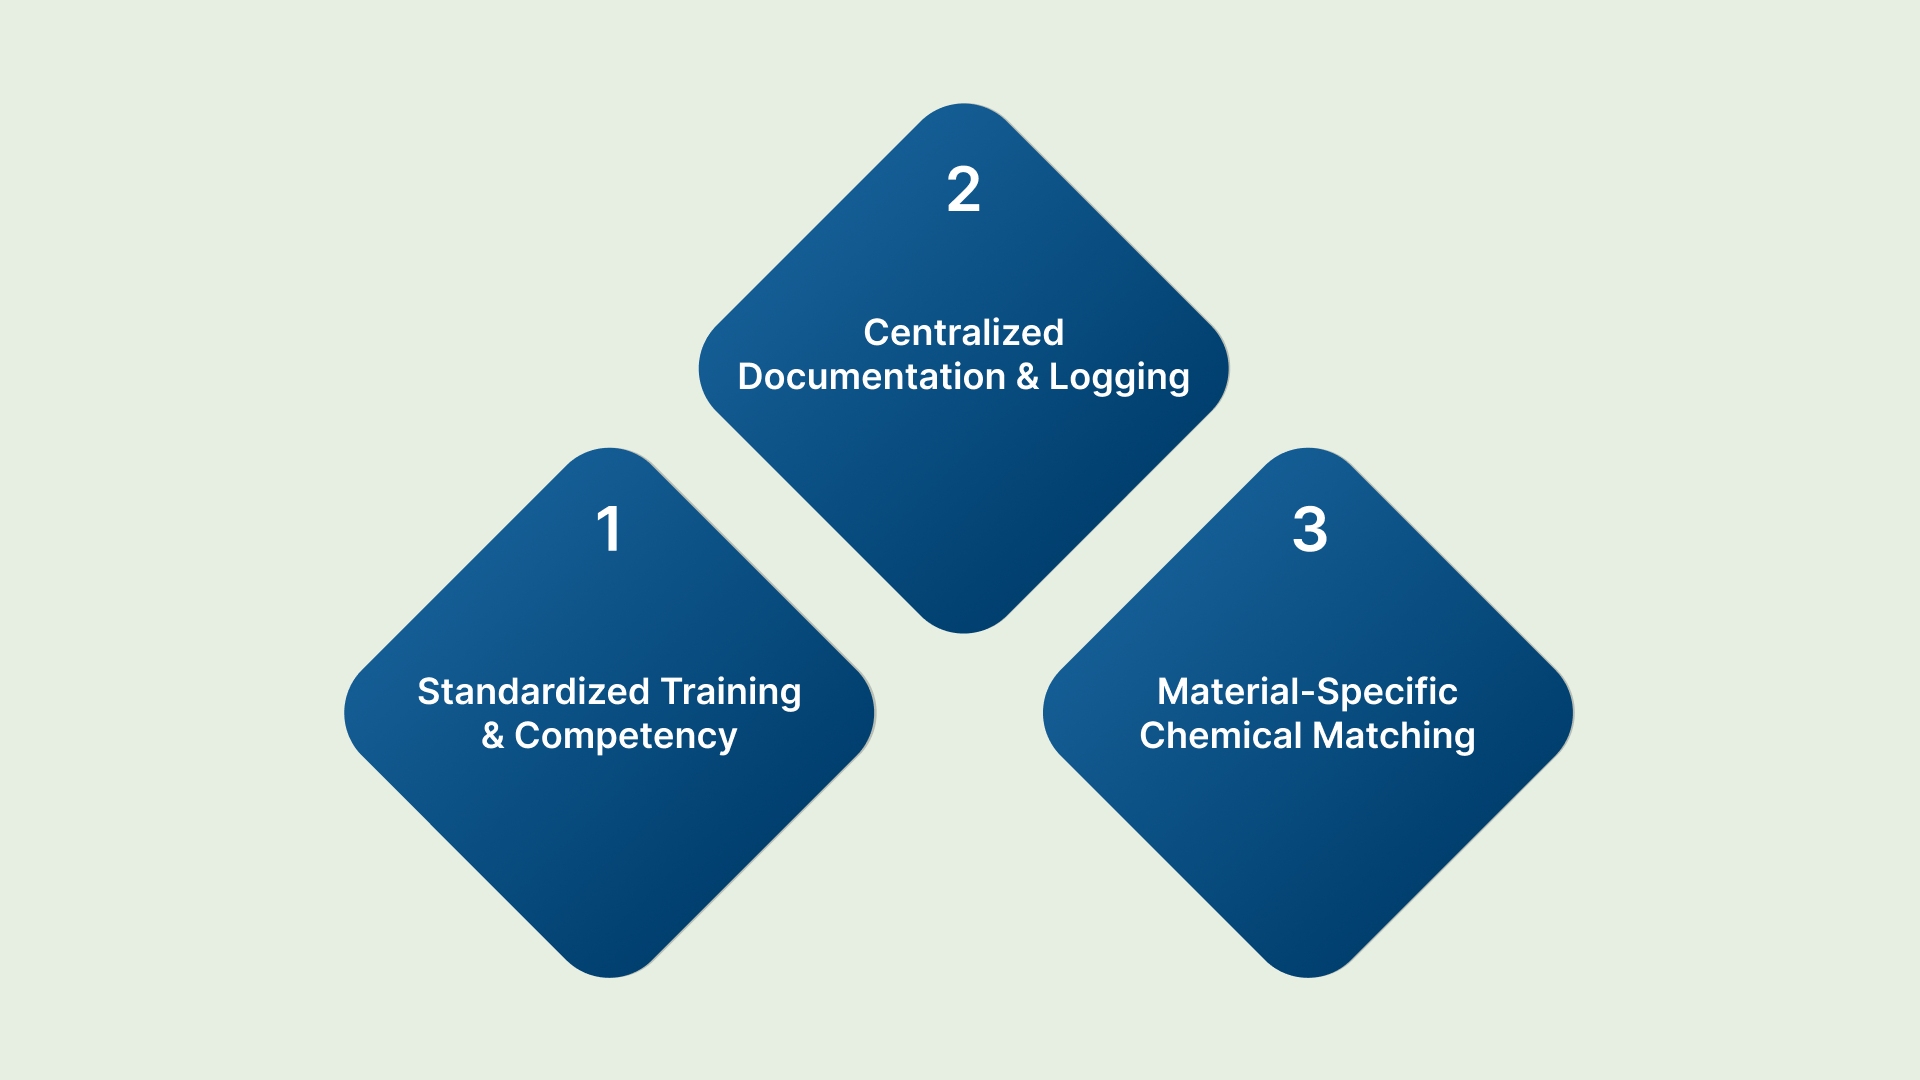
Standardized Training and Competency
Regularly train EVS teams on cart-specific protocols, including the correct PPE and dwell times for each product. Require annual competency checks to ensure consistent adherence to the SOP.
Centralized Documentation and Logging
Maintain a centralized, digital log of all cart cleaning activities, linking the cart’s asset ID to the cleaning tag data. This creates a defensible audit trail for regulatory bodies and helps identify problem carts or units.
Material-Specific Chemical Matching
Consult with your Materials Management and Infection Control teams to verify chemical compatibility. Harsh chemicals can degrade the specialized plastic and rubber components in quiet, non-marking casters, necessitating costly replacements.
Upgrading your facility’s cart standards this year? Contact us to source battery-powered medical carts and casters that align with your infection control program.
Once the cart is confirmed clean, the final step involves procedures that protect the cart from recontamination before it re-enters service.
How To Handle and Store Carts Post-Sterilization
Once a cart has been thoroughly sterilized, it must be protected from recontamination during its return to service. This stage requires careful attention to traffic flow and storage areas.
Here are some tips:
Clear Cart Designation and Tagging
Immediately after sterilization, attach a clean, highly visible tag confirming its status. This designation prevents the cart from being inadvertently used or touched before it returns to the proper unit.
Designated Clean Storage Areas
Carts awaiting deployment must be stored in a designated “clean” area with restricted access. They should never be stored in hallways, near soiled utility rooms, or close to active decontamination zones.
Safe Transport Protocols
Use only clean hands or clean gloves when pushing a sterilized cart back to its service unit. If the technician is transferring carts between clean and potentially soiled areas, they must change gloves.
Finally, scheduling dictates how often this entire procedure must be repeated to maintain continuous compliance across your entire fleet.
Frequency: How Often Should You Sterilize Medical Carts
The required frequency for cart sterilization is dictated by its use and the patient environment. Here’s what you need to know:
Cart Type/Use | Required Sterilization Frequency |
Isolation Carts | Immediately after use, and before reuse. |
Crash Carts/Emergency Carts | After every deployment, and at a minimum of once per month (checked for expiration). |
General Med/Procedure Carts | Daily, or between patient uses if the cart enters an isolation room. |
Computer on Wheels (COW) | Daily, focusing on the keyboard and mouse surfaces. |
Note for Cost Considerations: Increased sterilization frequency leads to higher labor and chemical costs. Investing in cart models featuring smooth, non-porous surfaces and fully sealed casters (often from custom sourcing) reduces the time required for cleaning, lowering long-term EVS expenses.
Conclusion
Mastering how to sterilize medical carts requires strict adherence to a detailed, six-step SOP focused on cleaning before disinfection. By standardizing your protocols and enforcing the critical dwell time, you significantly decrease the risk of HAIs and protect your patient population.
As a family-owned leader in industrial and healthcare mobility, Humphries Casters understands the rigorous demands of material handling in a sterile environment. We offer consultative guidance on cart design and wheel materials that simplify the cleaning process, helping you reduce the risk of staff injury and ensuring operational reliability.
We also customize special Application Motorized Carts such as Electric Battery Powered Motorized Medical Records Cart, Hospital Pharmacy Cart and Motorized Medication Carts according to your specifications.
Stop compromising between compliance and durability. Contact Humphries Casters today to ensure your fleet is equipped with contamination-resistant mobility solutions.
FAQs
Q. What is the difference between disinfection and sterilization?
Disinfection kills most vegetative pathogens but not necessarily all bacterial spores. Sterilization is a higher-level process that eliminates all microorganisms, including spores. Most medical cart protocols focus on high-level disinfection.
Q. Can I use bleach (sodium hypochlorite) on my medical carts?
Bleach is highly effective but should be used with extreme caution. It can corrode metal surfaces and cause plastic discoloration over time. Always verify compatibility with the cart manufacturer before using bleach.
Q. How often should caster wheels be cleaned?
The caster wheels and housing should be cleaned and disinfected as part of the daily cart protocol. The wheel assembly is a high-risk surface that touches the floor and must not be ignored during the deep-cleaning process.
Q. What is the biggest mistake EVS teams make during cleaning?
The single biggest mistake is failing to observe the full contact (dwell) time. Wiping the disinfectant off prematurely prevents the chemical reaction needed to achieve the stated kill claim, rendering the effort useless.
Q. Are there specialized casters that simplify cleaning?
Yes. Look for casters with fully sealed bearings and smooth, non-porous thermoplastic rubber (TPR) treads. These designs eliminate crevices where fluids and debris can collect, significantly reducing EVS cleaning time.
Q. Do cleaning protocols differ for crash carts versus general procedure carts?
Yes, they differ primarily in frequency and urgency. Crash carts require terminal cleaning immediately after use, regardless of the time of day, and must be inventoried and tagged for readiness. General carts follow a scheduled daily or shift-based cleaning cycle.